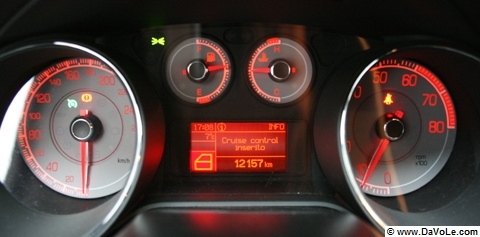
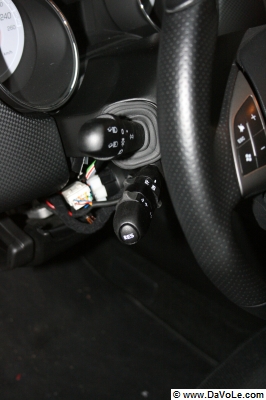
Ecco, I just uploaded an updated version of my tutorial for installing Cruise Control on a Fiat Bravo 198 1.4 T-Jet (110kw) Sport, without the necessary cables/connectors.
Fiat Bravo 198: Cruise Control aftermarket [update]
Now available: the PDF File with the description of how we installed Cruise Control on the non predisposed Fiat Bravo 198 1,4 T-Jet Sport (110kw).
Remember, I am not responsible for any damage on your car, if you try to install it.
Fiat Bravo 198: Cruise Control aftermarket

Yes, it’s true! Whoever said, it wouldn’t be possible to install Cruise Control on your Fiat Bravo 198, is a lier. Of course, for the lucky ones with the predisposed Bravo it was easy to buy the arm from the Alfa 147 and simply connect it. But the Bravo T-Jets and some of the M-Jets don’t have the necessary cables/connectors for the Cruise Control.
First i wrote an email to Fiat Italia and asked if it’s possible to install CC aftermarket. Naturally they told me it wouldn’t be possible. But I didn’t give up and began to make some researches on the internet. After reading lots of posts on different forums i knew that I would be the first one to install CC on a non predisposed Fiat Bravo 198.
After checking ePer and eLearn it seemed that there’s only one car wire harness for the T-Jet and the M-Jet, no matter if with or without CC. But the 4 cables were missing in my car. Just like on a few other Bravos.
So i checked ePer and eLearn again, to find out what i would need to install CC. After a couple of days for the research I knew what I needed to know, ordered the Alfa CC Arm and got a harness from a Panda.
Then my father and I began to lay the cables from the motor control unit to the steering wheel and connected them to the CC Arm.
Easy cheeze..
Maybe you think it’s easy to make the cruise control work on your Bravo, but unfortunately it isn’t.
It’s a lot of work! You not only have to lay the cables but you also have to be careful and accurate too, otherwise you could damage your car. And of course it had to look perfect..
So we needed approximately 5 hours to make it work.
Kudos to my father for his patience!
DIY Report
I wrote a description about how we installed it on my car. And you can download it here:
Tell me!
Feel free to leave a comment below if you installed it with the help of my description, if you encountered a problem or if you have a question.

